Edit Guide

Supernova - An Elemental Nova Runemaster Endgame Build Guide

Posted By Van on January 9, 2024
Last updated on January 9, 2024

Overview

?

'Supernovas, they're brighter than the brightest galaxies. They die, but everyone watches them go.'

Have you ever wondered what a supernova would look like? Yes? Great!

In this guide, I will show you how you can destroy your very own local star!

Ahem, I mean, build a Runemaster using Elemental Nova and Grand Prism Nova together with Spark Charge as our main source of damage.

The build is focused around Crest of Unity, Unstable Core, Mad Alchemist's Ladle and Fragment of the Enigma while stacking Intelligence, Cast speed and generating tons of Ward.

It's not your typical Sorcerer, as we have to be somewhat close to the enemies. However, we are very tanky and can survive and facetank almost everything, thanks to several mechanics through which we generate massive amounts of Ward.

More on that in the Gameplay / Mechanics section below.

Pros & Cons

Pros

Fun to play with a fast gameplay style

Massive area of effect damage which allows it to clear entire screens of enemies quickly

Great for farming monoliths

Extremely tanky

Satisfying to use and great looking skill VFX

Cons

Needs many very specific and somewhat rare unique items to properly function

High item and time investment needed due to the required stats and gear

Lack of single target DPS

Not suitable for beginners or for leveling due to the requirements

Needs a high level to equip certain pieces of unique gear

Gameplay / Mechanics

This build makes use of several mechanics to deal massive AoE (Area of Effect) damage and become very tanky.

In this section I will explain the typical skill rotation which I like to use and how the build functions.

Make sure that the first THREE skills on your hotbar are in the following order:

  1. Elemental Nova
  2. Flame Ward
  3. Frost Wall

It has to be this way, so that we can always cast Grand Prism Nova from Runic Invocation using Immutable Order 1/1.

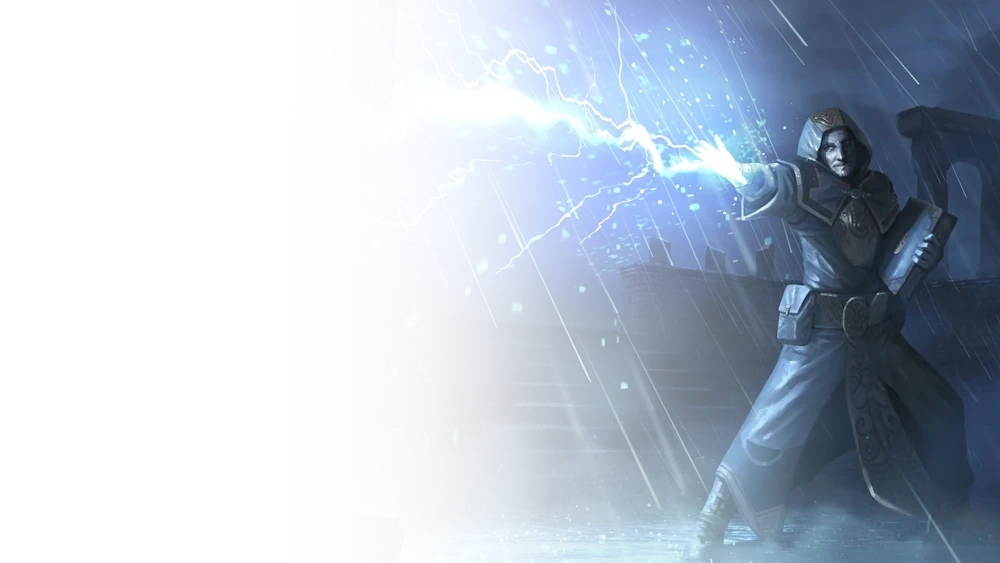
Elemental Nova is always Tri-Elemental through Crest of Unity, but for Immutable Order 1/1 it uses the 'rarest' element, in this case it is Lightning, since we do not have other Lightning skills.

Skill Rotation

To start a Monolith off, ideally you should cast Frost Wall in front of you a couple of times and walk through it, granting Ward through the Prepared Wards 1/1 node.

This also grants us Frenzy and Haste from Boosted Kickoff 3/3 which further boosts our Cast Speed. Do this throughout the entire monolith to keep up buffs and ward.

Once you have found the first enemies, cast Teleport to teleport in front of them, then casting Frost Wall and walking through it, triggering Prepared Wards, Aspirant's Arrival, Boosted Kickoff, Elemental Affinity, Elemental Dawn and passives such as Rune of Dilation 4/8, to further boost our damage and survivability.

(Note: If you are wondering when to cast Flame Ward, you realistically don't need to. You should generate enough ward through all these other means. However it can be used in a dicey situation as a sort of panic button.)

Now it is time to start spamming Elemental Nova through which we are gaining massive amounts of Ward, thanks to Twisted Heart of Uhkeiros combined with the leech of Grand Hunger of the Void, Rift Bolt and Lavamancer. But also because of passives like Arcane Focus 8/8 and Edict of the Scion 6/6 to replenish our life. It also applies a Spark Charge with every hit. And if there is a big pack of mobs around you or some tougher foes, use Runic Invocation to unleash a devastating Grand Prism Nova which deals significant burst damage. But so does every 6th Nova we cast ourselves, thanks to Unstable Core.

Before casting your Invocation, make sure that you have walked through a Frost Wall within the past 5 seconds to trigger Aspirant's Arrival.

While doing all this, you can continue to cast Frost Wall on top of the enemy to freeze them, but also to walk through it to keep our buffs up.

You can also keep casting Teleport on top of the enemy to trigger extra Novae.

Most of the normal enemy types however, should die by just teleporting onto them and casting a couple of Novae and then moving on.

Continue to do this until every foe in sight has been slain.

Necessary unique items

We are using Mad Alchemist's Ladle, because it boosts our cast speed even further by stacking Intelligence. Because of that, we can attack extremely fast.

This does several things, as explained above, it makes us very tanky because of the high amounts of Ward we generate, but it also applies a Spark Charge with every hit of Elemental Nova because of the Spark Charges 5/5 nodes.

The Spark Charge damage is boosted by many factors, such as several pieces of equipment which give us an increase in PrefixLightning Damage and Intelligence. Doubly so thanks to Fragment of the Enigma which gives a +2 to Lightning damage for spark charge per point of Intelligence. This is the main damage dealer of the build.

It is important to note that we do need Cryomantic Fragility 3/4 in order to keep up with our fast cast speed. Otherwise it is very easy to run out of mana.

Skills

Passives

Stat Priorities

Equipment

PrefixIntelligence and PrefixCast Speed are the most important affixes, followed by PrefixLightning Damage.

You can drop some of the SuffixCritical Strike Avoidance stats on items and replace them with health or resists you are lacking, if you choose the Grand Survival of Might instead of the Grand Resolve of Humanity blessing.

This depends on your gear and is made much easier if you have an Omnis for example, however it is not necessary to have this Amulet for this build to properly function.

But we want to make sure to hit 100% SuffixCritical Strike Avoidance and max out our resists at 75%, except for poison, since there aren't many dangerous enemies with poison attacks. And the ones that do use poison attacks, are usually very easy to dodge and avoid.

Idols

For the Idols we are just looking to increase the Area of our Elemental Nova and increase our lightning damage.

Throne of Ambition is optional to increase survivability even further. Feel free to leave it out and fill the slots with extra resistances, health or whatever else you might want.

Blessings

It is very important to get Grand Hunger of the Void as fast as possible.

The build works without it, but it is much harder to scale up Ward if we are solely relying on Lavamancer 5/5 and Rift Bolt 5/5 to replenish our health and thus generating ward from Twisted Heart of Uhkeiros.

Timeline
Blessings
Spirits of Fire
Fall of the Outcasts

Any

The Stolen Lance

Any

Blood, Frost, and Death

Any

Fall of the Empire

Any

The Last Ruin

Any

Build Variants

Leveling

This build is not recommended for leveling.

But generally speaking, you can use Elemental Nova paired with Teleport, using the Elemental Dawn, Elemental Dusk and Elemental Midnight nodes while leveling your Runemaster, as it is decently effective and a lot of fun to use.

Endgame

In the Endgame we are looking to min-max our gear and try to find our unique items with Legendary Potential and Exalted Items with tier 7 or double exalted affixes, so that we can grow stronger and farm even faster.

Loot Filter

No loot filter is provided for this guide. You can generate a loot filter for this build in the Build Planner or create one using Filter Wizard in the Loot Filters section.

FAQ

Video

Changelog

  • Build guide was published

Discussion

Continue on Forum