Edit Guide

Macabre's Berserking Beastmaster Build Guide

Posted by macabrest on March 6, 2024
Last updated on March 6, 2024

Overview

?

This build is THE barbarian-vibe build of Last Epoch. If you want to feel like an absolute monster with a big stick, look no further!

Offensive Overview:

  • A 100% focus on the physical damage type to avoid having to chase things like mana or alternative damage multipliers like lightning.
  • You will be stacking a ton of on-hit buffs, armor shred, and life leech at an incredible speed. Do you want to bop things real fast? Good! That's what you'll be doing more often than not.
  • You are a Boss demolisher. Insane single-target damage and general survivability essentially mean that if you're able to ramp up speed, you'll just melt anything you touch, and only the most massive of 1-shots will have a chance to kill you.
  • Your wolves will both do quite a bit of their own damage and be granted a significant amount of additional damage based on character stats and passives.
  • It clears most monoliths quickly and easily relative to the playstyle.

Defensive Overview:

  • SuffixEndurance will be at the max of 60% which reduces all damage when you are below the health limit of your SuffixEndurance Threshold of between 500 and 700.
  • A bit of SuffixArmor + SuffixArmor is nice to have.
  • 15% of nearly unconditional and 36% of conditional flat reduction to all damage. This will be discussed in more detail later.
  • You will have a truckload of PrefixMelee Damage Leeched as Health which can have its healing rate sped up with SuffixIncreased Leech Rate
  • SuffixHealth On Melee Hit is instant healing on-hit and can supplement the healing over time of the leech.

Regarding Unique items and beginner status:

  • You don't need any unique items for quite a while. The only exception might be Titan Heart as you enter empowered monolith as it gives the mostly unconditional flat 15% damage reduction discussed above, this becomes important during empowered monoliths. That being said, you will not need this item with any Legendary Potential (LP0) if you have it with fairly high base stats making it a common Unique drop. Its 100 armor, 40% health increase, and 40% melee damage will hold up fine somewhat deep into the late-game before you need to swap it out. Be warned, do not grab this item before you have a decent amount of leech and health on-hit as you will lose all health-regen.
  • This build can easily be for beginners to ARPGs as the concept behind it is simple, but it is not for beginners to action-combat isometric games; it starts easy for everyone, but you will need to be able to click your buttons correctly as you reach empowered monoliths.
  • Overall this is a good cycle starter as it's fairly strong at all times with a little focus on defensive stats; however, it is not a screen clear build, so if you're looking to speed-run your first character to get tons of gear as quickly as you can at the start of a season, then it's not for you.

Pros & Cons

Pros

Great for leveling, it's never particularly weak.

Incredibly survivable, an absolute monster bruiser build, and a quick killer in boss fights.

Decent mobility, especially into low-health enemies.

This is a very active micro-intensive build to maximize its potential if you're into that sort of thing. It is and feels like a 5 button build in a good way.

The only Unique equipment that's a near must-have is Titan Heart; however, with high fixed stats at legendary potential 0, it's quite usable and a pretty common drop.

Cons

You may feel a bit immobile while attacking with this build until you get into the flow of its combat.

If you stop attacking for more than 1.5-2 seconds you will have to restart ramping up some of your on-hit passive effects, namely Berserker.

It can be rough into AoE casters in high quantities (this is not always true if they are the type Fury Leap can one shot due to Aspect of the Mantis).

Survivability can cause a rough transition into the late-midgame if you rush to empowered monoliths (levels 80-87ish). After that, it's smooth sailing.

This is not a screen-clear, speed-running, meta build. It can make it as far as most of those builds, but it will take longer due to the smallish AoE of Swipe.

Gameplay / Mechanics

While this build is micro-intensive to stay alive, once you understand the abilities it is also pretty easy to wrap your head around and does immense damage as you scale up your equipment. Below is a brief explanation of how each ability interacts with the build and how you should use them followed by the skill rotation in combat.

Swipe is your primary damage output that also procs a number of other passives such as...

Summon Wolf is taken because the puppers are fun to have around and they provide insane boosts to the build such as...

  • The wolves themselves buff swipe through Wild Calling which can scale on character stats.
  • Howl's instant attack speed buff makes it far easier and faster to stack passives discussed in the Swipe and Warcry portions of this explanation.
  • During small mob engagements, Howl will consistently proc through Victory Howl, giving permanent in-combat haste through Call of the Wind and attack speed.

Warcry This is the first ability in every rotation. It is useful for its utility and several buffs it provides to you and your wolves.

  • It can pull enemies to you with Apprehend, this makes it much easier to hit more enemies at a time with Swipe and Wild Calling.
  • Stuns enemies out of certain abilities that you may not be able to deal with in any other way.
  • Battle Cry will increase the crit rate of you and your wolves.
  • Berserker is the core of this build when it comes to high-health mobs and bosses, it is what ties everything together with its insane stacking additive damage and attack speed buffs. The base ability just gives you flat +4 melee damage and the ability to stack 10 times.
  • Brutality is the following node in the Berserker tree, allowing for 5 more stacks and almost doubling the time it takes this buff to fall off after your last attack, this is a pretty big QOL feature.
  • Fury Strikes is the final node in the Berserker tree, really making this ability what it is. Allowing attack speed to ramp up over the first 4 stacks of Berserker at a rate of 12% per stack (total 48%).

Summon Frenzy Totem This skill is an absolute must-have going into empowered monoliths; however, through the campaign you can run Summon Bear instead for its taunt, providing some survivability while you unlock passives that can help you survive more easily. I personally mostly use Summon Frenzy Totem on bosses and high-health enemies as it interrupts you, soft-tethers you (if you want to increase damage you have to stay in its circle), and doesn't give haste like Howl does, but against high-health enemies and bosses as it generally ramps up every aspect of your build through:

  • Damage with Grounded and Dig In
  • Attack Speed with its base ability, Rabidity, and second-hand through the Furious Cry node (explained in the final bullet-point).
  • Crit rate and multiplier with Dig Deep and Lead The Pack
  • Minion Damage... I would link things but it's the entire right side of the Frenzy totem passive tree.
  • It resets your ability to cast Howl with Furious Cry, meaning almost 100% uptime on the Howl buff for you and your wolves during boss fights; you don't usually need this aspect of the totem while killing standard mobs because your wolves will self-proc Howl with Victory Howl.

Fury Leap This is your mobility/traversal ability

  • Try to land on low-health enemies for your first jump every 5 seconds as Aspect of the Mantis will allow you to do another jump.
  • Pulls enemies to you much like Warcry, with the Gravity node so you'll have a much easier time wiping slightly spread-out groups of spell-casters.
  • Invulnerable while airborne, so it can be used to I-frame certain moves with Heorot's Protection; this makes it possible to perform short jumps to avoid damage and stay in range to maintain your Berserker buff.
  • As was hinted at in point b, this is also your primary way of getting to AoE mages mid-fight, you'll find some variations of them to be your weak spot as you progress. Do not engage with this ability if you're in a monolith run with a lot of casters, use it to get at them mid-fight.

Your Rotations Will Look Like This

Assuming you've already used Summon Wolf pre-fight:

Bosses:

  1. Warcry Pulls enemies to you and provides buffs.
  2. Summon Wolf (HOWL) buffs for you and your minions.
  3. Summon Frenzy Totem (both for buffs and to reset Howl)
  4. Swipe until Howl's passive is over
  5. Repeat, starting at howl.

You will use Warcry again when you need to stun a boss If you don't need the stun utility, just use it on cooldown. You will find that once your attack speed and crit has scaled Ferocity will keep proccing casts of Warcry fairly consistently.

Mobs:

This is kind of up to you. Generally, you follow the boss rotation into high-health mobs. However, into mobs with a lot of casters, you will find yourself leaping in, using Warcry to pull things closer, then using Howl to speed up your attacks. Sometimes you'll want to save Fury Leap until after you engage to take out things you can't reach; you'll find your flow.

Skills

Passives

Stat Priorities

Equipment

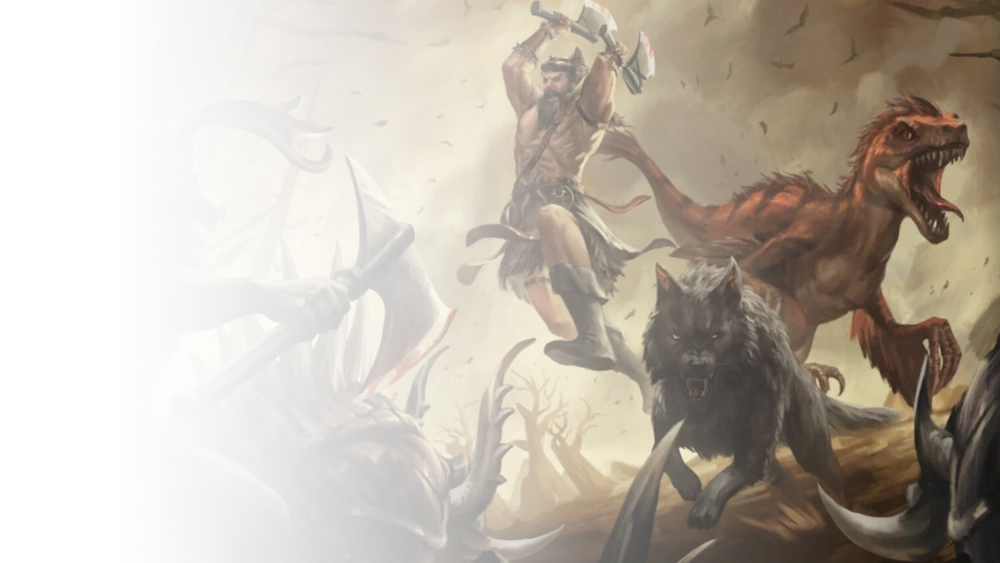
Uniques are optional, here are the BIS chase items if you feel like chasing them: (in order of importance)

Titan Heart LP3 or 4 is nice if you're not feeling tanky enough due to its 15% global damage reduction, 40% health increase; then there's the 40% melee damage bonus... It's the only piece of gear I would likely run even without any LP if the fixed affix rolls were fairly high, it's an insane buff to the build, and at LP0 it's a fairly common drop. This item is on the verge of being necessary by the time you reach empowered monoliths.

Harthenon's Vow is not vital to the build; however, I suggest chasing it to LP3 or 4 early on. This is largely because its drop rate is pretty high and it has several minor bonuses for the kit.

Artor's Legacy would be nice to have at LP4; because it is ridiculously rare, LP3 or even LP2 will be fine. Additional to +1 max companion and 20-30% attack speed... The chance to Chill on-hit will make you a bit more survivable due to the enemy's decreased attack speed.

Vaion's Chariot is probably one of the hardest chase items in the kit, but it will be BIS when you get a chance to chase it. Being faster is a buff for almost every class, to maximize this class keeping Berserker up is fairly important, so it's extra nice to have more mobility to keep travel time between mobs down. It will also buff the damage of your movement skill Fury Leap, meaning you are more likely to proc Aspect of the Mantis. I would easily run this with a good LP2 roll.

Dedication of an Erased Primalist is kind of odd in that a good one can only be attained through Weaver's Will... However, if you manage to find one and it has some good rolls on its upgrades (I received it and it seems to have a very high rate of +1 to abilities), it's probably one of the most important uniques in the kit due to the aspect of the spider working well with Trapper, a passive on the Swipe tree that provides a lot of damage per skill point invested.

Jungle Queen's Chaps of Holding Good for the increased physical damage and it's nice to have the extra potions so you can spam them if you can't get close enough to leech health.

Arboreal Circuit and Ribbons of Blood are anything but necessary and may be better when replaced by good implicit stats on a good exalted ring; however, making legendary equipment can give more bonuses or help with an item that has good affixes and bad implicits. These 2 rings have the most useful fixed affixes for this build. Only run either of these on a good LP4 in most circumstances.

Bleeding Heart is pretty straightforward: you leech more and attack faster. Regarding the bleed, the only spell in your kit is Howl and you don't cast that, your wolves do. As for the regen reduction, you won't have any by this point anyways. Do not run this item sub-LP3 as whatever amulet you'll be running will almost certainly be better. This item is largely for mages and is only here because this build doesn't have any good jewelry-slot items. You may want to keep a good Astrology Amulet over this item.

Some general notes on gearing: (in order of importance)

  1. You will need 75% on every resistance stat, likely by the time you start on the 2nd or 3rd monolith, this depends on how wide the gap is between your character's level and the suggested level. This is vital, even the end of the campaign can be tough without around 50% across the board.
  2. Get PrefixMelee Attack Speed on your gloves and weapon, this is a must going into the late game. Not only does attack speed multiply damage, it also allows you to stack your buffs more quickly.
  3. Getting around 500-700 SuffixEndurance Threshold and 60% SuffixEndurance is incredibly important as you reach level 80+ content. This stat is less important if you stay at the suggested-level, but most people are around 10+ levels under-level by that point. If this describes you, getting 1-shot far too often is in your future and you have no chance to life-leech. Much of this is taken care of by passives, but you will have to supplement the stat regardless.
  4. SuffixArmor, SuffixArmor, SuffixArmor and Reduced Bonus Damage from Crits, and SuffixStun Avoidance: These are all similarly important, you need to survive long enough to life-leech back to maximum health, and getting stunned will stop you from leeching.
  5. Ignore regen stats generally, all of your survival comes from copious amounts of life leech on-hit and Titan Heart will cancel regen bonuses anyway.
  6. DO NOT use on-kill passives or affixes other than Victory Howl. They work, but it completely defeats the purpose of an on-hit build and provides significantly less benefit.
  7. Get ADDITIVE PrefixMelee Critical Strike Chance bonuses where you can; getting 10-15% base critical chance will allow you to crit incredibly often after all of your passives are unlocked that multiply crit rate. The kit is packed with % increases for critical hits; however, you'll need some additives to boost the usefulness of said passives (added stats are applied, then that total is multiplied by % increased stats).
  8. The +1 to skills you want are PrefixLevel of Swipe and PrefixLevel of Warcry. The other abilities don't need any +1 other than maybe PrefixLevel of Fury Leap if you're desperate to justify a piece of gear; otherwise, it's a wasted stat.
  9. PrefixPhysical Penetration is fairly important as you approach 150+ corruption as you don't have a variety of damage types to lean on. A little will go a long way.
  10. PrefixMovement Speed this is a melee build, bet you can figure out why you will want to move faster.
  11. Get SuffixIncreased Cooldown Recovery Speed where you can because Fury Leap is very important for 2 reasons: It provides I-frames, mobility, and pull while killing mobs.
  12. Implicit affixes do not matter on items you plan to slot into Legendary gear.
  13. All of the listed items below include options other than those that provide resistances; fill any with items that have resistance implicit affixes where necessary. However, if you find a good Astrology Amulet, you may want to use that as reduction of damage over-time is almost non-existent outside of flat damage reduction or endurance.
Slot
Item
Stats

Blessings

With item drop blessings it is largely up to you based on what items you're chasing; as for all of the combat blessings like Cruelty of Strength or Grand Thirst of the Sun, they will be your BIS.

Timeline
Blessings
Ending the Storm
The Age of Winter
Fall of the Outcasts
Blood, Frost, and Death
Fall of the Empire

Build Variants

Leveling

  1. See the passive and skill progression sections of this guide.
  2. Bring Summon Bear instead of Summon Frenzy Totem until level 60ish if you want to make life easy- go to the Summon Frenzy Totem portion of the written skills guide above to find out why.
  3. Feel free to start with dual-wielding using Harmony of Blades because you won't get another chance until after level 100 and it's kind of fun.
  4. Follow the passive and skill progression listed, if you feel you're dying too quickly, put extra PrefixMelee Damage Leeched as Health or SuffixEndurance on your gear or grab a couple of extra points on the Lamprey Teeth passive node.

Endgame

This build is decent if not exceptional in the late game; however, your success will probably come down to your capacity for microing your character. Additionally, this is not intended to be a screen-clear build, so if you're a meta-chaser trying to maximize clear speed, this probably isn't the build for you.

Some spell casters will be your absolute worst enemy; you'll find most of your deaths are linked to them, especially the nuke-birds and other AoE casters. At first, it may feel as though you can't handle them, but given practice and managing Fury Leap's cooldown well enough you will be fine. The casters will not be what stops you from pushing further into corruption; however, the fact that they stop you from life-leeching to avoid their AoE likely will be.

Loot Filter

Just do a quick read-through of this loot filter, it's meant for somewhere between level 65-100 than the early game. Right after you get some of your first mediocre monolith level 60 gear, you'll want to apply some stricter filters like these. Check on and off the nodes you want/need. They should be pretty easy to make more or less strict.

You can find the filter here: https://pastebin.com/sbyS0AGy

FAQ

I'm pretty sure this guide is comprehensive, but if you have any questions at all drop a comment in the linked video on my channel (https://www.youtube.com/channel/UCIucuS0xVydp6nWJcYoMifw) and I will get back to you as soon as I see it.

Video

Changelog

  • Build guide was published

Discussion

Continue on Forum